Cooking in the shower – U.F.S.

Unidentified Fish Sandwich

IMG_0944

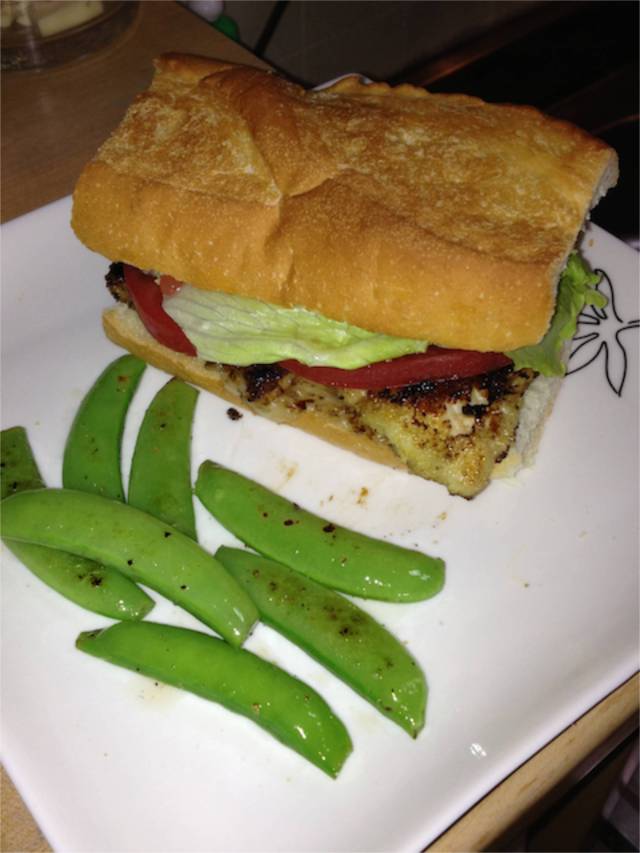
Maybe you can tell what kind of fish this is…

I am posting this sandwich recipe at Andrew’s request, mostly because he flattered me and said it was one of his favorite sandwiches of all time. With an endorsement like this, you must be dying to know how to make this for yourselves. Luckily, it is ridiculously simple and basically foolproof. Not that you’re a fool, that’s not what I meant, I’m sorry…ugh. *face palm* Way to alienate your audience Shana.

I decided to make fish sandwiches one night, utilizing Japan’s awesome Panko breadcrumbs, and whipped up a quick homemade “remoulade” of sorts. The results were delicious, so without further ado, here’s what you’ll need:

Fish- I would tell you what I used, but I have no idea! (Cue X-files theme) Unless it’s swordfish or salmon, I generally can’t tell what I’m buying at the market here in Japan because I’m illiterate, in Japanese…obviously. If it’s white, free of bones and eyes, that’s what I buy! If you are in the states, you will have many more options. Pretty much any white fish you like will work great. According to Oceana, 33% of the fish sold in the US are mislabeled anyway, so don’t worry about it (The TRUTH is out there)! Since the fish will be breaded and slapped between some French bread, it doesn’t need to be fancy, so grab what’s cheap. Cod, snapper, tilapia, all good. Leave the halibut for a special occasion. On a side note, I never understood why people would come into the seafood restaurant and substitute the cod for halibut in fish and chips. Yeah it sounds good, but pretty much any fish beer-battered and deep-fried sounds good. Way to waste $20 on fish and chips, true story

French bread- whatever manifestation you like best. I would avoid the baguette and stick with something wider and softer. One loaf should serve two to three people. If you want to be all healthy, you could do wheat I guess…

IMG_0947

Panko

Panko- This crust-less breadcrumb is available everywhere, even outside of Japan. Look in the Asian foods area of your grocery, or sometimes even where the standard breadcrumbs are kept

IMG_0943

“Remoulade”

Sandwich fixin’s- I used a little lettuce, red onion, tomato, and a couple pickled jalapeno slices, but feel free to add or subtract as desired. I also added cheese once, yummy, something like white cheddar or pepperjack is good

Egg- one egg, beaten, used for dredging

Mayo-based spread- If you don’t feel like anything fancy, you can just slap some mayonnaise on your bread. I finely chopped a tablespoon of capers and mixed them with a couple tablespoons of mayo, a squeeze of lemon juice and fresh ground pepper. A little hot sauce might not be a bad addition either…

One sauté pan

Put your panko crumbs in a shallow dish and add a little fresh ground pepper and salt. Put the beaten egg in a bowl next to the panko. The closer these dishes are to the stove, the smaller the mess. It is always smart to throw down some paper towels too. Slice your bread and place in the toaster oven, optional to butter the slices first. If you want to use cheese, put some slice on the bread now. I chop all the sandwich fixings first and arrange on a plate. Whip up your remoulade sauce if using and place near the toaster oven.

Heat your sauté pan to med-high with a little oil. One piece at a time, take the fish filets and immerse in the egg to coat. Then place the fish in your panko dish and cover both sides with crumbs. IMG_0949Place your breaded fish directly onto the pan, cooking on both sides for a few minutes until crispy and cooked through.IMG_0952

Use these few minutes while the fish are cooking to turn on the toaster oven and wash a few dishes if possible. A great home cook will always clean as they go. Once your bread is toasted, slather some remoulade on half and arrange your fish. IMG_0954

Garnish with your favorite toppings and enjoy!

IMG_0955

You can serve this sandwich with pretty much anything you like. If you want to keep your cooking to one pot like me, go with a cold salad or coleslaw. This is a super-easy way to bread fish in general, so next time you want fish sticks, keep panko in mind!

Voila!

Voila!

Cooking in the shower – Lettuce Wraps

Even when I wasn’t attempting to diet here in Japan, I made these lettuce wraps for dinner. They are light, delicious, fast, and only need one pot to make! This recipe is an amalgamation of different online sources I found when I Googled “P.F. Chang lettuce wraps.” If you haven’t tried these at P.F. Chang’s, definitely do, but I think you will be pleased with the outcome if you try these at home. Plus they won’t break your budget like P.F. Chang’s will… IMG_0962

What you’ll need:

lettuce leaves: You want something big enough to hold but pliable enough to fold, if that makes sense. Stay away from super-crisp lettuce like iceberg that won’t wrap. Just stay away from iceberg in general… Butter leaf will work, or romaine, whatever is your favorite. Even cabbage is great for this, I prefer the Chinese Nappa. If it’s your main dish, have at least four large wraps per person, six if they are smaller.IMG_0963

1 pound ground chicken: or turkey, or pork. I don’t think ground beef would mix well with the rest of the ingredients. If you want to go vegetarian, use tofu or other preferred meat substitute. I sometimes add tofu to these wraps to make them a little more hearty. If you have a chicken breast that’s lying around, you can cut into small pieces and use that instead of ground meat. One pound will serve four if you have complimentary dishes, otherwise two people can make this their whole meal.

white or yellow onion finely chopped: some recipes say to go with a whole onion, I’m usually happy with half. Use however much you prefer.IMG_1291

2 cloves chopped garlic

1 ½ tbsp ginger, peeled and minced

1 tbsp soy sauce

1 tbsp rice wine vinegar

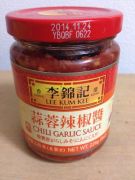
hot sauce of choice: you can go with Tabasco if you like it mild, sambal oelek for an extra bit of garlic, Sriracha for heat, cayenne pepper, chili oil, whatever floats your boat. Or use real chilies (which I don’t have access to in Japan) like serranos, jalapeno, etc. How much to add is also up to you, I do at least 1 tbsp of sambal oelek.

hoisin sauce: I have come to adore this stuff, which I never used extensively before coming to Japan. It just makes light meat like chicken and pork sing! Start with a couple tablespoons and taste to see if it needs more. It really gives the meat a nice color as well when it’s all mixed in

handful of chopped green onions

sesame oil

Heat a non-stick skillet to med-high and add your chicken, breaking up the meat to cook evenly. IMG_0967When chicken begins to look opaque and cooked through, add the white onion. Saute together for a couple minutes to soften the onion. IMG_0969Add the garlic and ginger, mixing to combine. IMG_0970After thirty seconds, add the soy sauce, vinegar, hot sauce, and hoisin as necessary. Lastly, add your green onions and a drizzle of sesame oil for a little extra flavor. IMG_0971

Prep and cook time place this recipe around 15 to 20 minutes. There are also lots of ways to vary this dish if you want to try it again differently, or use up random veggies you have lying around. I add tofu, but sauted mushrooms would be good for umami as well. If you want some extra crunch, try any of these:

water chestnuts  IMG_0974

peanuts

bean sprouts

carrots

bell peppers

zucchini

daikon

jicama

IMG_0965These wraps come with dipping sauce at P.F. Chang’s, and although they taste great on their own, feel free to add any side sauce you enjoy. I usually serve alongside a bottle of sweet chili sauce, but I’m sure a savory peanut sauce, hot Asian mustard or a creamy cilantro dressing would be good too. This is another great “foundation” recipe that can be tweaked in so many delicious ways. IMG_0973

You can even ditch the “wrap” altogether and add some chopped cabbage to the pot (or kimchi if you’re like me) and serve over rice for a whole meal. This is good for larger groups, as you can pre-cook everything up until the hoisin and green onions and store in the fridge. When you’re ready, warm it up and finish it in the skillet. It would probably even be tasty as cold leftovers, I haven’t tried it yet since there are never any leftovers at my house! I don’t even have a picture of actual said lettuce wrap because I ate it too fast, so send me yours after you make this!


Cooking in the shower – Rockin’ peach salad

IMG_1220

Peaches, watermelon and cucumber are spruced up with a little fresh basil

As I’ve probably mentioned before, cooking in the summer is a drag. It’s hot and a tiny kitchen with no windows is the worst place you can choose to be, which is why my strategy for summer meals involves a lot of cold items that take minimal amounts of prep, but are still delicious. Utilizing produce that’s in season will “up” your meals on the deliciousness scale, and even with all the different nutrition data out there, whole foods are still generally your best bet.

I am attempting to do Weight Watchers here in Japan (a more in-depth post on that coming soon) and fruit counts for zero points, so every meal of my day is accompanied by some sort of fruit. By dinner time, I try to find a way to use fruit in a savory context, and it just so happens that savory fruit salad is simple to prepare and requires no cooking whatsoever. Since peaches are in season at the moment, I have been eating this delicious peach salad on a regular basis. Here’s what you’ll need:

peaches: I use one peach for two people, so up the quantity as necessary. I keep the skin on, slice around the pit like a mango and slice into strips.

watermelon: seeded and sliced into bite-sized pieces.

cucumber: one cucumber thinly sliced.

basil: I slice my basil using the classic chiffonade method. Stack leaves on top of one another, roll them up like a cigarette and slice in thin ribbons vertically. For this salad I use at least five large basil leaves, adjust to your taste. Mint will work in a pinch, but I prefer the savory quality of basil. Sweet, lime, Thai, any type of basil is fine.

vinegar: I use white wine vinegar because it is what I can find here in Japan, but champagne vinegar, riesling vinegar or any manifestation of a white vinegar will work.

honey: whatever floats your boat, organic or the stuff that comes in that cute bear-shaped bottle.

Take a couple tablespoons of your vinegar and mix with at least a teaspoon of honey. Add more for a sweeter dressing. Whisk until blended. Toss the sliced peaches, basil, cucumber in a bowl and drizzle with the vinegar dressing. If you want to prepare ahead of time, chill the salad in the refrigerator and add dressing at the time of serving. A little fresh ground pepper on top never hurt anyone.

Peach salad with avocado

Peach salad with avocado and radish

Mix and match: This salad is great because the above are the basic building blocks, and almost any fruit you can think to add will be delicious. I added avocado once, plum another time. Adding all this at once might just send your taste buds into a state of nirvana. I’m not sure, you ought to try it and let me know. Thinly sliced apples would add a nice crunch; sliced grapes would lend moisture and pineapple or mango would add sweetness. The possibilities are virtually endless, I would only suggest abstaining from banana. Keep the bananas at breakfast where they belong. For some reason after writing this, the image of a lonely banana sitting in a corner labeled “Breakfast” came to mind, and now I feel very sad…

But seriously, even if you feel bad for the bananas, leave them out. Other savory additions that could be enjoyable include red onion, radish, shallot (good luck finding this in Japan because I sure haven’t), a squeeze of lime juice, and a couple drops of chili oil. So have fun experimenting or take this to a summer potluck and have fun experimenting on others!

Cooking in the shower – Japanese Curry

Something I have discovered that I did not expect from Japanese cuisine is curry. In the states, our Japanese restaurants are limited to sushi, tempura and teriyaki. Never before have I seen a bowl of curry on a menu back home. So imagine my surprise when on my second day in country I was handed a bowl of delicious beef curry. Japanese curry is rich, aromatic, filling, easy to make and inexpensive to cook. Here’s what you will need to serve one person: IMG_0848

Package of Japanese curry base: Japanese curry is not a paste or powder, but comes in the form of blocks. Each block usually has four sections that break apart. When I cook for two I use the whole block, so you may only need to use half. You can buy these in any market or convenience store in Japan, and Asian markets in Western countries should have them too.

Beef: If you want a vegetarian curry, simply omit this. Look for a cheap cut of beef steak that is at least half an inch thick. This isn’t always easy to find in Japan, so my decision to make curry for dinner usually occurs when I see a piece of meat I can use. Andrew once bought me thinly sliced beef on accident, which wasn’t terrible, but nice hearty chunks are a better texture for curry. If you have better access to beef, use any Top Round or Sirloin cut, trimming extra fat as desired. Cut into bite sized cubes.IMG_0849

Potato: In Japan, the common potatoes I see at the market tend to be quite small, which is very frustrating when you want to peel them. If you are using small potatoes for one serving, you only need a couple. If you find the large ones, definitely one will be enough. Peel and chop into bite sized pieces.

Carrot: Japanese carrots are also a little stubby compared to those in the states, but just one will do the trick. Peel and thinly slice. I usually cut the bigger rounds in half again, but it will depend on the width of your carrot.IMG_0851

Onion: White or yellow onion will work, again these tend to be smaller in Japan. For a single serving you need less than half, more if you really like onions.

Rice: I suppose you could eat this curry sans rice, but why would you want to? Rice is what makes this a really filling meal. I use one cup of uncooked rice for two people, so halve that if you want a single serving.

If you make the rice in a rice-cooker, this recipe becomes a one-pot dish. Start the rice first and it will be ready when your curry is done. Heat a large pot on medium and add a neutral oil like vegetable or grapeseed, which I recently found at the market! Chop your onion into small pieces, but not minced. I cook the onion first so that is has a chance to get soft. Sauté for a few minutes or until the onion looks translucent. Add your bite sized beef to the pot to brown for a few minutes. IMG_0853

Once brown all over, add the potato and carrot. Let these all sauté together for a few minutes, stirring occasionally to let the carrots and potatoes soften. IMG_0854

Add water just enough to cover your meat and veggies. You want to boil them so they are soft, but you also want a thick curry, so you don’t want too much liquid. IMG_0857

Bring everything to a boil and then lower the heat to simmer for around ten minutes. I test the potatoes with a fork after ten minutes to see if they are soft. If not, continue to cook a little longer. Then add your block o’ curry. If you are cooking for one, start with half the block.IMG_0856

The liquid will darken but it will seem thin at first. Allow the mixture to continue to cook for a few minutes to thicken. IMG_0858The consistency should be like stew, thicker than soup but not as thick as gravy. If it’s still thinner than you would like, keep adding those curry blocks as needed. Put your rice in a bowl and ladle your curry on top. Itadakimasu IMG_0861

Everything but the kitchen sink

More than likely if you are new to Japan you will have to invest in some kitchen items when you get here. If you come solo chances are (hopefully) that you will score a “furnished” apartment, but since my husband and I came together, this option wasn’t available. We had to furnish our empty kitchen on our lonesome, and I learned a thing or two about Japanese appliances. If you find yourself in this situation, here’s some advice on the basic necessities to purchase for your kitchen.

I’ve lived with some pretty small and crappy kitchens in my time of apartment dwelling, but nothing can top the restrictiveness of my “kitchen” here in Japan. I hesitate to even use the word kitchen, since the area shares its space with the bathroom and the entryway. The sole “prep” area consists of a small spot next to the sink where I must also dry my dishes.

On to the list:  IMG_0825

1. A refrigerator: Depending on your budget and the space in your apartment, the bigger the better. I have a tiny fridge because it was the only one that could fit in the kitchen, and now I regret not just getting a bigger one and putting it in the living room. Bigger is better because it enables you to keep more than two days worth of meals at a time, which limits the amount of times you have to go to the grocery store. Since I have no car and a small fridge, I go to the store almost every day.  The bigger the fridge, you can also store leftovers which means you won’t have to cook new meals every day. But since I don’t have one, all the cooking tips I will be giving you will be for small dishes.

2. Microwave: I don’t have a microwave, mostly because I don’t have anywhere in my kitchen to put it. But if you are blessed with the space, I would recommend one if you intend to eat leftovers or processed food. Since I can’t store any leftovers, I don’t think I will need one. Also fresh food is always cheaper than the prepared packaged stuff.

IMG_0847  3. Stove-top burner: My Japanese kitchen was also not be equipped with a stove or an oven. Actually the only thing that does designate it as a kitchen is the sink and a few cabinets. If you want to cook anything, including hot water for tea, you will need a burner. Having a gas line and being a huge proponent for gas cooking, I opted first for a gas burner. Once hooked up, this sucker is ridiculously powerful and super hot, so be sure to keep it on low even for things you’d cook at high heat. I bought a unit with only one burner, as the double burners were much more expensive, so I spent the first few weeks only being able to cook things one at a time. If you see a reasonable two-burner range, pick it up. But make sure you check with your landlord about which type of gas your apartment uses! If you have natural gas you are in luck, because it is very inexpensive. But if your apartment hates you, like mine does, you may have liquid propane, which is terribly expensive. Not knowing anything about this, I was very discouraged to receive my first gas bill for $133. This was not all cooking-related, the gas is also what heats the hot water. Living with two people who need showers, laundry and dishes washed obviously added to this total. But geez! I was not expecting that. Which brings me to begrudgingly recommend…

4. An electric burner: While never as effecient for cooking as gas, the electric burner can be useful for most basic cooking needs. If you decide to go all electric, I would recommend a unit with two burners, as it will expand your meal options considerably. Also assuming you have the counter-top space for this. The electric burner I purchased has four settings, each a different wattage which I assume roughly translates to low, medium, medium high, and high. I find that like the gas burner, the “high” setting is ridiculously hot. The more options the better, so if you see a burner with more settings opt for that one. I think my single burner was around $30 so it shouldn’t brake your bank. I purchased this at a home goods store, but always check the used goods stores first, this goes for every appliance. They are much better qualilty than any thrift store back home and usually come with a limited warrranty.  IMG_0841

5. Rice cooker: Since we live in Japan, this is a no brainer. Sure, you can cook your rice on the stove, but since we already discussed how precious the limited stove top space is, get a rice cooker. They are great for setting and forgetting, so that you can multi-task in the kitchen. Any used goods store should have a plethora of rice cookers on sale. You will only be cooking small quanities of rice, so small is fine. Some rice cookers have extra functions for steaming food and vegetables, so if you want this and can read the labels, go for it.

IMG_5092  6. Toaster oven: Like I mentioned, Japanese apartments don’t seem to come with ovens. A small toaster oven will be very useful for many reasons. When you go about purchasing a toaster oven, be sure to examine the settings and try to find one that does more than simply toast. The day I bought my toaster oven was also my first day living in Japan, so I was a bit overwhelmed and did not look carefully at the toaster oven we bought. I assumed it was like every toaster oven in the states. Wrong. All it does is toast, with one knob for the timer. The temperature cannot be controlled and it does not have an option for just the top burner for broiling. But there are toaster ovens here that have these options, so make sure you see more than one knob with diffferent temperatures and “bake, broil, and toast” settings. This simple differential will give you heaps more options with your menu, so don’t be cheap if you want to eat anything besides toast.

Most likely  you will be blessed with a furnished kitchen, but just in case you aren’t I hope this is useful!

Cooking in the shower – Sobarashi

IMG_1027

Zaru soba

The humidity is creeping up on us a little more each day, now that we are in the swing of the rainy season. I can only anticipate the discomfort that will occur in the full-blown summer of Japan. When it’s hot and humid, I know the last thing on one’s mind is cooking. Hot weather dulls the appetite as well, since it’s hard to think about eating hot food. Luckily Japan has mastered the art of delicious cold food, so today I present to you a one-pot dish of joy called Zaru Soba.

I first had this delightful cold meal in Yamadera where it is a famous local specialty. I noticed how simple it would be to prepare at home, and promptly did so the following week. The dish consists of cooked, cold soba noodles, which you dip in a broth-like liquid and eat with various preferred condiments such as seaweed, green onions and pickled cucumbers. It is now Andrew’s favorite Japanese dish, and he can cook it too, which should prove to you its simplicity! My husband is not as experienced in the kitchen as I, although he feigns incompetency as a way of deferring the cooking duties to me. Luckily I have found a dish we both enjoy cooking, and I hope you will enjoy it too.

The ingredient list is short: soba noodles, zaru sauce, and toppings.

dried soba – You want a thicker soba noodle, avoid the angle-hair style. If you are in Japan, the thick type usually have a picture of Zaru soba on them, so that should make it easy. I use one standard size package for two people. I’d love to tell you actual amount but I can’t read the Japanese and my understanding of the metric system sucks anyway. See the photo for size reference. This dish is also great because you can make a few noodles as a snack or side, or up the quantity for a whole meal photo

 sauce for dipping – If you live in Japan it is sold at essentially all markets, even convenience  stores. The bottle also pictures an image of cold soba noodles on the label. In America you might  find this at your local Asian grocer, look for a bottle labeled Zaru ざる. If you can’t find this it is  pretty simple to make, and you can vary it depending on your desired flavor. The basic components         are:

1 ½ cups of dashi stock

IMG_1031

Soba sauce as sold in Japan

¼ cup of mirin (sweet Japanese cooking wine)

¼ cup soy sauce

pinch of salt

Since dashi stock is a whole other recipe I don’t want to go into here, I will say that my palette is not refined enough to be able to notice the subtle influences of dashi. If you use a little more soy sauce and add water to taste, you will be on the right track to mimicking the zaru sauce. I would even add a splash of rice vinegar for some tang. The idea is to have a light, thin liquid that will give the noodles some flavor without clinging to them like a traditional pasta sauce

toppings – the traditional items are finely chopped strips of nori seaweed and finely chopped green onions. In Yamadera they included pickled cucumbers, which were delicious. In Japan you can buy pre-chopped green onion mix and pre-sliced nori. I buy the ingredients whole and chop them myself. I also add thin slices of fresh cucumber and a few sesame seeds. They provide a roasted flavor, so if you don’t want this just omit them. Other options include pickled ginger, tempura flakes, and chili oil if you want to make it spicy.

Preparation: Once you have your toppings ready, simply boil a pot of water and add your soba. The thicker soba takes approximately 5 minutes to cook, just test a noodle for doneness. Strain the noodles in a colander and rinse with cold water to stop the cooking process and to achieve the desired “cold” noodles. If you are preparing other items with this meal, you can leave the noodles in the colander while you do other things. Simply rinse with water again to separate the noodles when you’re ready. IMG_1028

Place a small amount of the zaru sauce in a medium to large sized bowl. You want enough to coat the noodles but they do not have to be swimming. It is not necessary to add a lot of sauce as it does not stick to the noodles. Place your condiments on the table and the drained soba on a plate. I line the plate with a couple paper towels to absorb extra moisture and prevent slippage.

The final preparation is at the dinner table. To enjoy, place a helping of noodles in your bowl with the zaru sauce already in it. Stir in your noodles and toppings and its ready to eat!

For some protein and in keeping with the cold food, you can serve this with sashimi or edamame. If you order this in Japan they actually serve the soba in a woven basket. It is a nice touch if you want to serve this to folks at a dinner party. This is an ideal dinner party recipe because it can be prepared in advance and won’t get cold!

Subarashi is the Japanese word for wonderful, so when I eat this I like to say sobarashi!

Soba for dinner with sashimi and caprese

Soba for dinner with sashimi and caprese

Importing happiness

My next installment of “Cooking in the Shower” is about finding some non traditional ingredients. You might be perfectly content with the traditional ingredients offered at the Japanese grocery. If you are, you are lucky and your finances will thank you. But if you are like me and need a little variety once in a while, here are the best “import” items to buy that I have found readily available. Many Yamaya’s carry these, which is like the BevMo of Japan. Or look for import grocers like Jupiter’s or the chain Pecce.

Yamaya Sign

Yamaya Sign

Olives: canned green and black olives make a nice addition to pasta

Capers: my personal favorite pasta add-on, capers are also great with chicken and fishIMG_0906

Yellow mustard: all the dijon-style mustards in Japan use horseradish like the Chinese powdered mustard. For a normal mustard you will have to search the imports, but it comes in handy when you want hot dogs

Maple syrup: they sell syrup in the Japanese markets, but it is always tiny and expensive. Just go for the real stuff which is practically the same price

Oatmeal: the only place I have found oats is at the import market. Japan doesn’t seem big on whole grains

Cheese: import cheeses I have found include goat cheese, feta, pepper jack, brie, cheddar and gouda. Pretty expensive for what little you get. The goat cheese seemed to be the best deal at $5 and I used it for over a week

Beer: The Yamayas carry many non-Japanese beers, they are even more expensive. I saw a 12 oz bottle of Corona for $3. Big bottles of Duvel seemed the best option at $10.

Wine: A decent bottle of wine is not going to be cheap, but you can find some Napa, Argentina and French varietals at the Yamaya

Alcohol: the Yamaya will have the best selection of spirits if you want something besides sake and soju

IMG_0959

The Italian section of Yamaya

Snacks: I found bags of pretzels at the Yamaya for $1! They also have real tortilla chips and salsa, but not as cheap

Misc. ethnic items: Each store is a bit different, but they usually have an Italian section, Indian foods (I saw ghee the other day), Thai soups and coconut milk, and one store even had a Mexican section complete with tacos. I also picked up some couscous and gnocchi for a good price, plus some authentic Kraft Mac and Cheese to feed my artificial orange addiction.

Alternative Aisan/Indian cuisine

Alternative Aisan/Indian cuisine

Cooking in the shower – Ramen: Your new best friend

IMG_0674

Dried ramen with shrimp

Ramen! I loved ramen before coming to Japan, but I worried that eating it every week might lessen its charms. Fortunately that is not the case, ramen is always delicious, and luckily it is easy to cook and cheap to make. It is generally cheap at restaurants as well, so you might be asking yourself if it is really any better to make at home. My answer is a resounding yes for many reasons! When you go out, you know you will want something to drink, and if you’re anything like me you will be telling yourself you deserve a beer. Well maybe you do, but not for $7! There are so many added temptations when you go out to eat, especially if you are with others. Soon you will want another drink, and then there’s that dessert… So trust me, your budget will always be safer at home!

Also if you’re like me, you may not speak Japanese very well, and therefore end up with whatever picture of ramen you were able to indicate to by stupidly pointing and nodding your head excessively. When you make it at home you can be sure it is just the way you like it. My ideal ramen includes mushrooms and kimchee which is not generally the way it is served in Japan. Likewise, it does not include ham which is my least favorite of the meat family. Your options for ingredients are as various as your cravings can demand. Want beef today? How about shrimp? Vegetarian? Try tofu.

The possibilities go on and on, so I will cover the basics for your ramen foundation, and then we’ll talk about options.

Japanese Top Ramen

Japanese Top Ramen

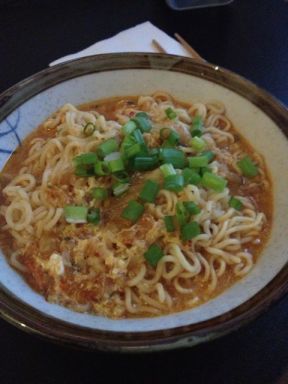
Your basic ingredient needs: instant ramen. That is as simple as it gets, good old Top Ramen. Not Cup o’ Noodles!!! Cup o’ Noodles is the bastard half-sibling to Top Ramen who will try to woo you with its pot-less cooking powers, but do not succumb! I can’t think of anything good for you that can be eaten directly out of styrofoam. Just heat up some water, throw the instant noodles in the pot for a few minutes, remove to a bowl and add the seasoning pack with your preferred amount of broth. Since this is elementary and no one needs Top Ramen instructions, let’s move forward to a slightly more advanced ramen lesson. A friend back home, who is a trained chef, turned me on to using fresh ramen noodles, mushrooms and kimchee. It is absolutely delicious, here’s what you’ll need:

fresh chopped ginger

fresh chopped garlic

IMG_1043

Kimchi in Japan

kimchi finely chopped – Korean spicy fermented cabbage, luckily sold everywhere in Japan and pretty much in all major stores in the US. If you have an Asian market nearby, pick it up there as it will be way cheaper

noodles – this is up to your preference, you can use udon, fresh ramen, dried ramen, soba fresh or dried, or instant ramen

mushrooms, stems removed and caps thinly sliced – if you are in Japan, shitakes are good. If you don’t have easy access to shitakes any medium sized button-like mushroom will do. Apparently out of all the mushrooms, the button variety are the only ones that don’t supply you with any nutritious benefits, so use these only in the worst case scenario

broth seasoning – this can be those packets from the instant ramen, or the Japanese markets sell individual liquid ramen seasoning. If you have none of the above, use fish sauce, rice vinegar and soy sauce to build flavor

optional additions:

prep school

prep school

meat

seafood

cabbage

egg

fish sauce

rice vinegar

soy sauce

citrus

yellow or white onion finely sliced

green onions

chilies, chili pepper or chili oil

You’ll notice there are no quantitative amounts next to the ingredients. This is partly due to the fact that I had no measuring instruments when I perfected this recipe, and because it will be totally variable on your appetite and your taste buds. These recommendations are good for one serving, so multiply as needed.

IMG_1046

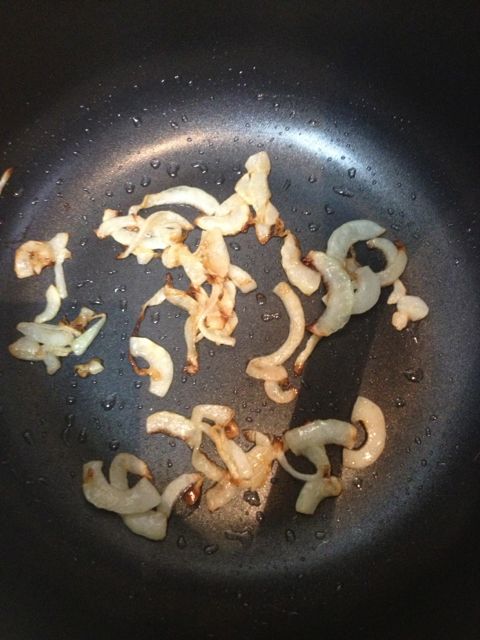
Saute the onions

Use a pot or pan that has a good surface for frying but is also deep enough to hold your broth. Heat a little oil in the pot, I use vegetable but anything with a neutral flavor will do. If you want to use mushrooms, add them first (with a little butter if you have it) and let them brown for a few minutes. If you want to use onion add it now and let them cook to your desired softness, at least a couple minutes. Then toss in at least a tablespoon of the ginger and at least one garlic clove, more if the batch is larger

IMG_1048

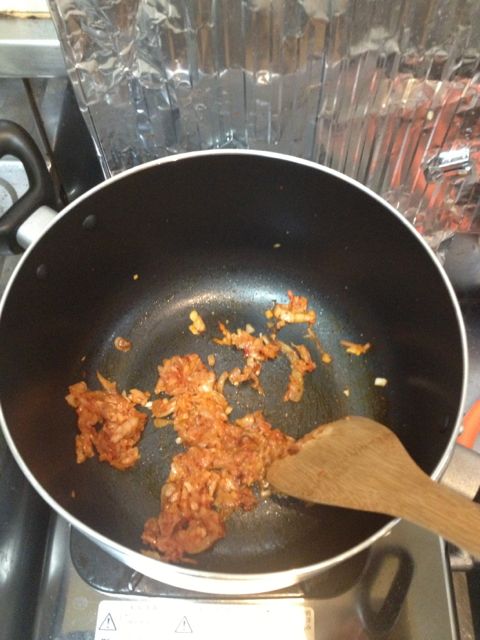
Add the garlic, ginger and kimchi

Saute this for about thirty seconds and then add your chopped kimchi. I do about ¼ cup for one serving, more if you like it spicy. Cook for another thirty seconds and then add water. It is always good to have a little extra broth, but you don’t want too much water to dilute your flavors. I generally fill up the bowl I will be using with water, add it to the pot and then add another half bowlful. Bring this to a boil and add your seasoning. Check for taste, and add additional seasonings to taste. For umami and saltiness, add soy sauce. For tang and complexity, add fish sauce and rice vinegar. I do a little of all three and adjust to taste.

IMG_1050

Boil the broth

If you are using the instant noodles, you can add them straight in to your broth. If you are using fresh or dried, it is recommended that you cook them separately in water and rinse in a colander, so that they will not be overdone. You also may not have enough broth to submerge them, so this method insures that they are completely cooked. If you only own one pot, and are not using instant noodles, cook the noodles first and rinse with cold water after you drain them to halt them from cooking further.

IMG_1052

Cook the noodles

After your broth is hot and seasoned, add any other ingredients you want to use. Thinly sliced meats (prepared for you in Japan) can be added like shabu shabu. Raw shrimp will also cook itself in the boiling broth. Add chili oil or pepper for heat, and cabbage for consistency. If I’m not using meat or seafood, I like to add egg for protein. Whisk an egg and drizzle it into the hot broth for thorough integration. You can do poached, soft-boiled, hard-boiled or even a fried egg, but since these all take additional cooking surfaces, I stick with the egg drop method.IMG_1054

Turn off the heat and ladle noodles into your bowl, top with broth and finish with green onions if desired. Even if you want to stick with the easy instant stuff, you can see how easy it is to make some simple additions that up the flavor-palate and the nutritional value. Some other items you can try are:

veggies: bok choy, zucchini, eggplant, daikon, potato, lotus root, chives, bean sprouts, carrot

protein: tofu (firm), sliced beef, pork, chicken, shrimp, the processed fish cakes they make in Japan (think wafers of Krab with a K), seaweed

tempura: Japanese markets sell patties of tempura fried vegetables that can go on top of your noodle broth, delicious!IMG_0733

So get creative and have fun with your ramen! Itadakimasu

Why am I “Cooking in the Shower?”

Why should you read my cooking blog?

IMG_5528

prepping a stirfry…on Stir-Friday!

I have never wanted to have my own cooking blog, for many reasons. First of all, there are a million of them already out there, written by people with more culinary experience than me. I feel like I am still in the “learning” phase, and am definitely not an expert on any one facet of cooking. I am generally a recipe-follower and not a recipe generator.

I don’t really like cooking blogs. I’ve never followed one. Actually I’ve never followed anyone’s blog, does this make me an awful hypocrite for writing one? I never understood the point. It seems too much like watching reality TV, which I hate. Who are these people? Are they qualified to give me advice? Why do they insist on including personal information when all I wanted was a recipe? I cook because I want to, and I cook what I want. Why would I want to mimic someone else’s daily diet? Also I’m a pretty huge fan of Alton Brown and I’m sure I can learn everything I need to know in a more trustworthy and entertaining fashion from him. For being a thespian, I have never really craved the limelight like one would expect. I have a hard time believing that people would want to read about my life.

IMG_0897

Cheap & Easy

Up until recently I didn’t think anyone was going to read any of this. I figured the blog was basically just well-crafted personal emails to the only people who cared, my parents. Fortunately I have a few more readers now and that means I am even more conscious of keeping things interesting. And to the point. I have a tendency to be long-winded when I do get around to sharing my opinions (another reason I avoid writing but I will be better with “Cooking in the Shower,” after this post. I swear). Writing a well crafted entry is time intensive for me and I’ve never had this much spare time before. Besides, none of this would be happening without Andrew. Andrew created our blog and was the one who forced me to write on it, begrudgingly at first but he encouraged me to find my voice. I have decided that if this “voice” can help, inform or amuse my fellow travelers it will be worthwhile. Otherwise it is just adding to the noise.

So yeah, why am I writing this again? Like I said, I’m not an expert, and since I don’t read blogs I’m not even sure this will be unique. But I find myself in a new situation with new challenges, trying to learn about Japanese food with only the internet for my guide. Cooking every day is a challenge and can be a strain without being in a foreign country to boot. If I can make some other ALTs’ lives a little easier my time won’t be in vain. Maybe my niche can be making weekly meal menus for all you ALTs who are busy teaching. Or to inspire you to cook in spite of the fact that cooking for one’s self is much harder than cooking for others. Believe me I know, most of the time the motivation for whipping up anything more than a can of soup is simply non-existent.

Cooking is best when as a communal activity. While recipes books and cooking shows can be helpful, they are sterile. They are not interactive. They do not ask you what you need, or what you want, and definitely are not sympathetic to your budget or your schedule.

I am!

I want you to be well-nourished and empowered, not complacent and reduced to Top Ramen every night. As I move forward, please tell me how I can help. My goals are to provide cooking tips tailored to the tiny Japanese apartment but will work in a gourmet kitchen, to help your cooking become a joy and not a burden, and to convince you that home cooking really is the best choice for your budget, your health, and your soul. If this sounds up your alley then please join me in the kitchen, or should I say the shower hallway? In my apartment they are one in the same!